 My fan-art of a Niffler done on Adobe Sketch app
Update Dec 2017: Due to your feedback, I have recounted all the stitches in the body and edited the pattern! Thanks for all the interest in this pattern.
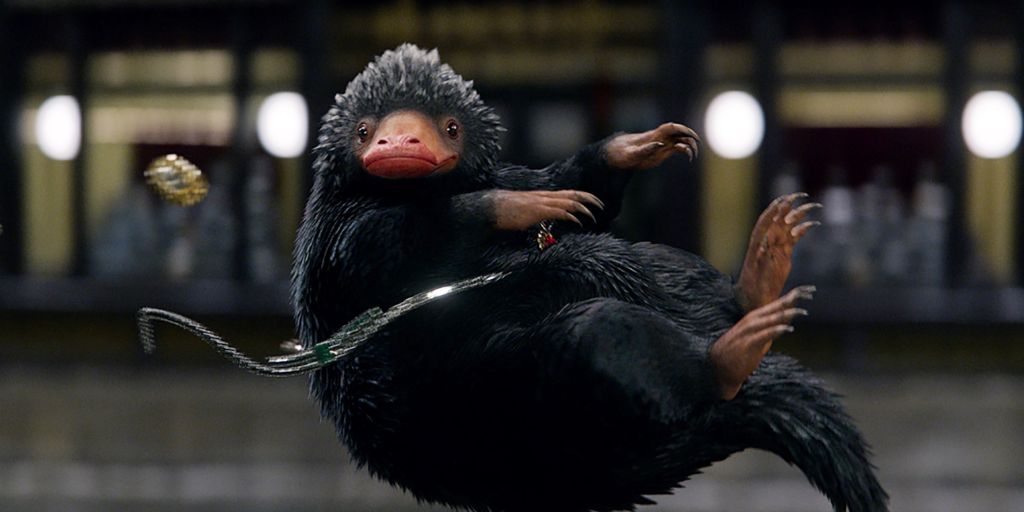
Hello hello hello! I’ve been cracking my head about what to do for my next Amigurumi tutorial. It needs to be cute, it needs to be popular and it needs to be unique! I guess a Niffler from the Harry Potter franchise and especially in the latest Fantastic Beasts and Where to Find Them movie franchise fits the bill perfectly. I mean, who could resist this mischievous troublemaker:

For those who are unenlightened, a Niffler is a Long-snouted, burrowing creatures native to Britain with a penchant for anything shiny.
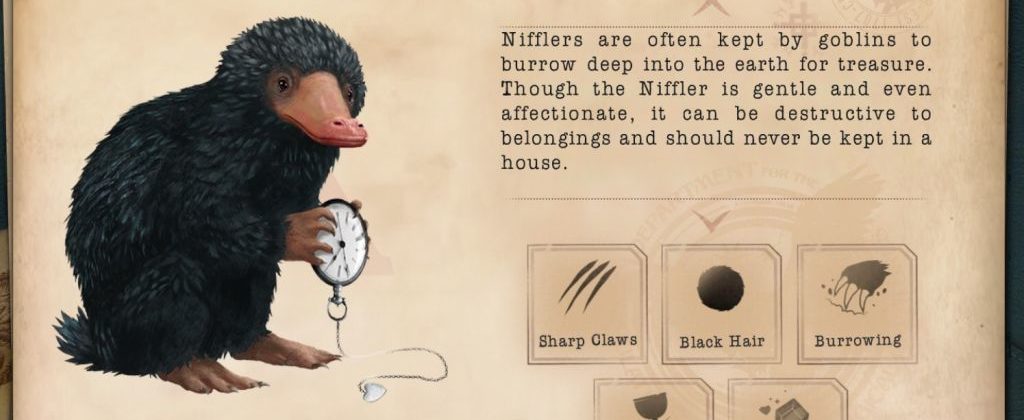
The game app “Fantastic Beasts: Cases from the Wizarding World” also had a nice drawing and fun description.
 Okay enough of me faffing about. Here’s my Amigurumi pattern, completely free, for you Amigurumi and Harry Potter fans!
I have to mention that there’s another free awesome Amigurumi Niffler tutorial that inspired this pattern, but I like to try writing the patterns so that each Niffler I make can be almost exactly the same. Mine is a lot smaller as well, as I prefer Amigurumi that are small and cute.
Body, starting with the tail
- Black yarn, Magic Ring 6sc (single crochet) (6)
- 1sc in each sc x6 (6)
- 1sc in each sc x6 (6)
- 1sc, 1sc, 2sc, 2sc, 1sc, 1sc (8)
- 1sc x3, 2sc x2, 1sc x3 (10)
- 1sc x4, 2sc x2, 1sc x4 (12)
- 1sc x4, 2sc, 1sc x2, 2sc, 1sc x4 (14)
- 1sc x5, 2sc, 1sc x2, 2sc, 1sc x5 (16)
- 1sc x6, 2sc, 1sc, 1sc, 2sc, 1sc x6 (18)
- 1sc x6, 2sc x2, 1sc, 2sc x 3, 1sc x6 (23)
- 1sc x8, 2sc, 1sc, 2sc, 2sc, 1sc, 2sc, 1sc x9 (27)
- 1sc x 27 (27)
- 1sc x 27 (27)
- 1sc x 27 (27)
- 1sc x6, 2sc, 1sc x2, 2sc, 1sc x7, 2sc, 1sc x2, 2sc, 1sc x6 (31)
- 1sc x7, 2sc, 1sc x3, 2sc, 1sc x4, 2sc, 1sc x 3, 2sc, 1sc x2, 2sc, 1sc x7 (35)
- 1sc x 35 (35)
- 1sc x 35 (35)
- 1sc x9, 1 dec, 1sc x3, 1 dec, 1sc x7, 1 dec, 1sc x3, 1 dec, 1sc x 5 (31) — You can start stuffing now.
- 1 dec, 1sc x 15, 1 dec, 1sc x 14 (28)
- 1 dec, 1sc x 13, 1 dec, 1sc x 13 (26)
- 1sc x 26 (26)
- 1 dec, 1sc x 10, 2sc, 1sc, 1sc, 2sc, 1sc x 11 (26)
- 1 dec, 1sc x 10, 2sc, 1sc, 2sc, 1sc, 2sc, 1sc x 10 (31)
- 1 dec, 1sc x 10, 2sc, 1sc x 5, 2sc, 1sc x 11, 1 dec, 1 dec (31)
- 1sc x 11, 2sc, 1sc x 5, 2sc, 1sc x 11, 1 dec, 1 dec (31)
- [1sc x 4, 2sc] x 5, 1sc x 6 (36)
- [1sc x 5, 2sc] x 5, 1sc x 6 (41)
- 1sc x 41 (41)
- 1sc x 41 (41)
- [1sc x 5, 1dec] x 5, 1sc x 6 (36)
- [1sc x 4, 1dec] x 4, 1sc x 6 (31) Start decreasing gradually from here round by round until closed.
- [1sc x 4, 1dec] x 5
- [1sc x 3, 1dec] x 5
- [1sc x 2, 1dec] x 5
- [1sc x 1, 1dec] x 5
 Next we shall do the pouch on the Niffler.
It is just a rectangular piece of crochet which you can later sew onto the body.
Pouch
- Black yarn, Chain 8
- Turn, 1sc in 3rd chain, 5sc, chain 2
- Turn, 1sc in 3rd chain, 5sc, chain 2
- Repeat for 16 rows
- Leave a long tail (about 40cm) for attaching to body.
- Black yarn, Magic ring 6sc
- 2sc x 6
- 1sc x 12
- 1sc x 12
- 1sc x 12
- [1sc x 5, 1 dec] x 3
- 1sc, 1sc, 1dec, 1sc, 1sc, 2sc, 1sc, 1sc, 1dec, 1sc
- 1sc, 1sc, 1sc, 1dec, 1sc, 1sc
- 1sc x 7
- Switch to peach yarn, 1sc x 7 and close the opening by stitching the two sides flat together using 1sc in the outer 2 chains in the loops.
- Black yarn, Magic ring 6sc
- 2sc x 6
- [2sc, 1sc] x 6
- [2sc, 1sc, 1sc] x 6
- 1sc x 24
- 1sc x 24
- 1sc x 24
- 1sc x 24
- [1dec, 1sc x 5] x3
- 1dec, 1sc x 3, 1dec, 1sc, 1dec, 1sc x5
- 1sc x 4, 1dec x 3, 1sc x 4
- 1sc x 11
- 1sc x 11
- 1sc x 4, 1dec, 1sc x 5
- 1sc x 8
- Switch to peach yarn, 1sc x 8
- Close the opening by pressing the two sides flat together and stitch the outer loops together, 1sc x 3x.
Beak-Snout, Snout-beak, or Sneak?
- Using peach yarn, magic ring 6sc
- 2sc x 6
- 1sc x 12
- 1sc x 12
- 1sc x 12
I stuffed it a little before sewing it on the face so that it keeps its shape better.
- Using peach yarn, magic ring 5sc and attach to head beside the beak.
- Add a black bead or plastic eye in the middle, I find that a bead 0.5cm in diameter works best for a Niffler this size.
- Make two!
At the moment it looks like a bald black chicken because we have not added hair.
Hair is added around the head in single strands of about 3-4cm long black yarn to make it easier to attach. After attaching to the parts you want, you can trim it down to about 1-1.5cm. Then split each yarn into individual strands to make it look softer instead of thick clumps. (See how to add hair on another blog here.)
The hair is the most tedious part of this entire Niffler so exercise patience. I put more hair on the head and neck (one strand in each loop) and spread it out further on the body (around one strand per 2-4 loops).
And it is finally done!!!


 Writing this tutorial has given me a new appreciation of all the Amigurumi patterns out there. It took me three weeks and more than 30 hours to come up with the pattern. It might not be perfect though so let me know if you have any suggested edits!


There seems to be some miscounted stitches in rows 9 and 10.
You have them listed as (20) & (22).
But when I counted them they came up as (18) & (24).
If you could help me correct iI would be most grateful.
Thank you Jessica, I have updated my pattern and I appreciate noticing the problem!
No problem! I love amigurumi and as odd as this sounds, I love looking over patterns for mistakes.
Just glad I was able to help.
First of all, thank you for this adorable niffler, as a huge Harry Potter fan I’m really glad I found it.
I did, however, have some difficulties with the individual rows, especially on the Body part. I’m not sure whether it was me who got it wrong, but I wanted to start and finish my rows at a continuous point, so I did some calculations and came up with the following modifications that worked out just fine for me. These are the rows I changed for the Body:
10. 1sc x 5, 2sc, 1sc x 2, 2sc x 2, 1sc x 2, 2sc, 1sc x 5 (22)
17. 1sc x 34 (34)
18. Same
20. 1dec, 1sc x 13, 1dec, 1sc x 13 (28)
23. 1dec, 1sc x 10, 2sc, 1dec, 2sc, 1sc x 10 (26)
24. 1dec, 1sc x 11, 2sc, 1sc, 2sc, 1sc x 11 (28)
25. 2dec, 1sc x 20, 2dec (24)
26. 1sc x 7, 2sc, 1sc x 4, 2sc, 1sc x 7, 2dec (24)
At the Arms I just followed the instructions in a kind of infinite spiral (without counting rounds), which worked, as for the Legs, I interpreted row 9. in a way that I repeated the brackets for 3 rounds instead of 3 times in total. Also, instead of row 11. I did 11. 1sc x 5, 1dec, 1sc x 5 (11)
All this caused me some confusion, and as I said, I’m not quite sure if I just had the wrong approach in general. I don’t mean to criticize the creator of this pattern or anyone else, I’m only sharing it for people who may have similar struggles and would like to know if anyone else was as confused as I am.
Thanks again for the wonderful pattern and good night.
Really appreciate your feedback to make this pattern better. I am still very much a novice at this and appreciate any suggestions for improvements.
No problem!
What a lovely pattern! I’m going to try it as a present for my sister, who is a huge potterhead 🙂
What kind of yarn did you use? Do you have any recommendations? 🙂
Hi Sarah, what a thoughtful gift! I don’t think my yarn’s brand is widely available as I am in Singapore. However you are welcomed to use any readily available yarn. If it is for a gift, I recommend a higher quality and softer yarn! The niffler would then turn out soft and cuddly.
Row 24 is giving me fits. When I try the original row 24, it totals up to 29 stitches rather than 28. When I try Auri’s modifications, the 28th stitch doesn’t fit into the row. I’ve crocheted and ripped out that row and a few others – at least a dozen times. Finally had to walk away for a while. Help!!!!
Hi Rene, I apologize for causing you so much stress! I have recounted and edited the rows.
I see you updated the pattern in 2017 the from my count rows 10, 15, 16 all have flaws if you could rewrite those rows it would help me so much. Thanks
Done! Thank you for catching the mistakes in the counting.
This is such an amazing pattern. I’m making my second niffler now, I’m still amazed at how easy to follow the pattern is. I’ve made mine a bit “fatter” around the belly, because I think it’s cute that way haha. Thank you so much for making and posting this pattern!
Thank you so much for your feedback. Yes, I think a fatter niffler would be extremely cute too. I would love to see your final niffler!
Love the pattern, but what size hook do you recommend?
Hi, sorry about the late reply. I usually use a 2mm or 2.5mm hook.
I hope you are still monitor the page 🤞🏼🤞🏼. I am stuck, and can’t seem to figure it out to get the right numbers. With how it is written now – there is no way to get from row 19 to 20 as written. I have 31 stitches at the end of 19(as written). But with only 2 dec(s) in row 20, that gets me to 29 stitches not 28.
Apologies, I fixed Row 19.