My youngest brother is getting married! While searching for ideas, I see a lack of pretty Wedding couple related free amigurumi patterns out there, I decided to post my own here. This pattern is customised with their favourite animals, for that whimsical touch.
First of all, I have to warn you that this amigurumi is a huge project and took me over 4 weeks to complete. There are also many parts to it. Please undertake only if you are truly and utterly committed!
I had also wanted to make this a post of both the amigurumis but it was getting too long! The amigurumi groom pattern is below. The amigurumi bride’s pattern is coming very soon! here.
Head
- Choose a yarn color that is closest to the skin tone of each figure. Magic ring 6sc
- 2sc x 6
- (2sc, 1sc) x 6
- (2sc, 1sc, 1sc) x 6
- (2sc, 1sc, 1sc, 1sc) x 6
- (2sc, 1sc, 1sc, 1sc, 1sc) x 6
- Rows 7-11: 1sc x 36
- (1dec, 1sc, 1sc, 1sc, 1sc) x 6
- (1dec, 1sc, 1sc, 1sc) x 6. Start stuffing it here, make it very compact!
- (1dec, 1sc, 1sc) x 6
- (1dec, 1sc) x 6
- Rows 16 & 17: 1sc x 12
This is the head and neck done and we will start doing the shoulders and undergarments next.
Groom Body
Continue from above, after the neck.
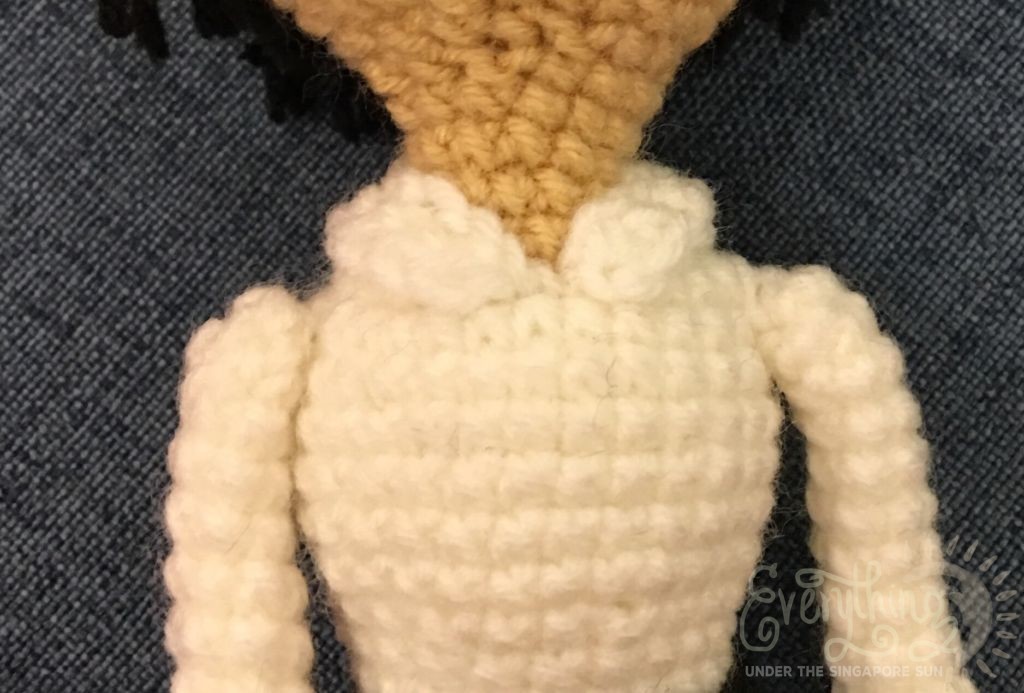
- 1sc x 4, switch to white 1sc x 8
- Switch back to skin tone yarn, 1sc x 4, switch to white 2sc x 8
- White: 1sc, Skin: 1sc x 2, White: 1sc, 2sc x 4, 1sc x 8, 2sc x 4. From here it is all white yarn.
- Rows 21-26: 1sc x 24
- 1sc x 8, (1dec, 1sc, 1sc) x4
- (1dec, 1sc, 1sc) x2, 1sc x 12
- Rows 29 & 30: 1sc x 16
- Change to color of pants (for my design, I used a multi-coloured blue green yarn): 1sc x 10, (2sc, 1sc) x 4, 1sc x 2
- 1sc x 10, (2sc, 1sc, 1sc) x 4, 1sc x 2
- Rows 32-34: 1sc x 28
- 1sc x 10, 1dec, 1sc x 12, 1dec, 1sc x 2. Add more stuffing into the body. (26)
- Now this part is a little tricky as we are splitting the opening into 2 to create the individual legs. First do 1sc x 4. Then make a chain of 4. Then count 11 loops after the last one with the stitch and join the end of the chain to the 11th loop, diving the opening into 2. It should look like this:

- Now we will just do one pant leg, following the clockwise action. 1sc x 12, and 1sc x 3 into each loop of the chain.
- For the next 16 rows: 1sc x 15. Close the end.
- For the next leg, we will do 1sc x 15 for the next 17 rows. (Basically get both legs the same length.) Stuff both legs.
 We are going to do the hem on the pants for that special touch. It is little details like this that makes this amigurumi look even better. This is completely optional.
- One long chain 22sc
- Turn and insert into 3rd stitch, 1sc x 20
- Leave a long tail and attach to the end of the pants.
Make two.

Groom Arms
- Magic ring 4sc, white
- (2sc, 1sc) x 2
- Next 8 rows: 1sc x 6
- Switch to skin color, 1sc x 6
- 1sc x 6
- 1dec
- Close up and tuck in the loop.
- Make two and attach each arms to the body where the arms would be.

Groom Hair and Eyes
- The eyes are easy enough. Sew two black beads on the head and you’re done!
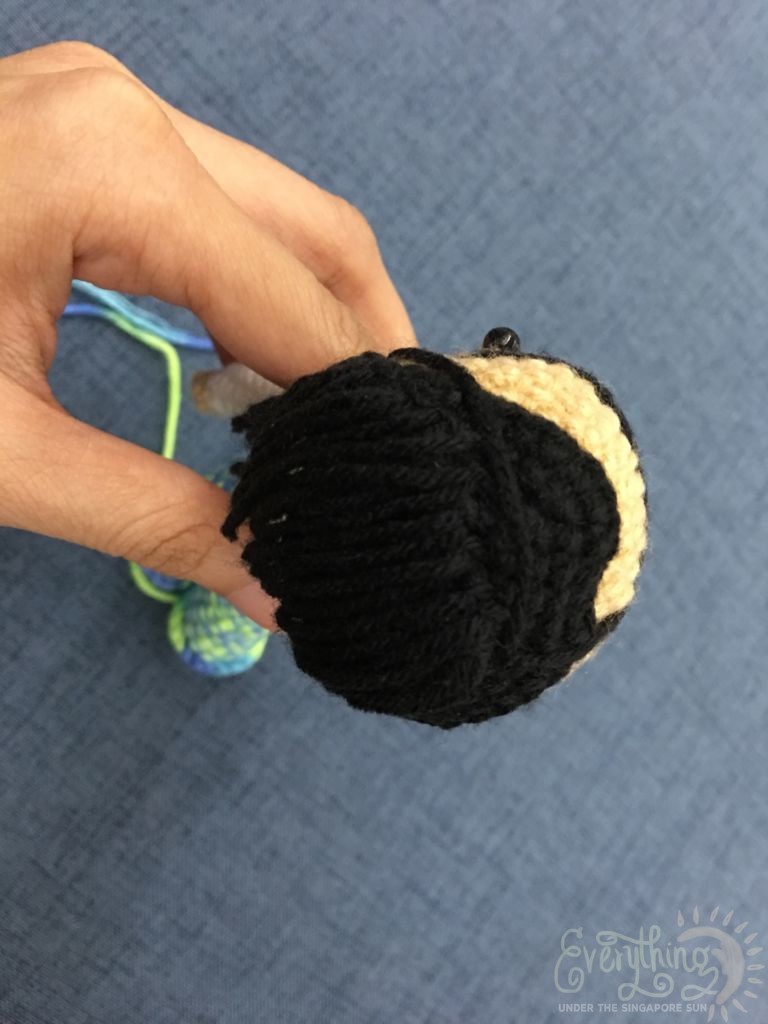
- The hair needs to be shaped strand by strand so that it matches the hair style of the groom. But first we do a scalp of sorts, in the hair color of the groom, in this case, it is black. Magic ring 6sc
- 2sc x 6
- (2sc, 1sc) x 6
- (2sc, 1sc, 1sc) x 6
- (2sc, 1sc, 1sc, 1sc) x 6
- (2sc, 1sc, 1sc, 1sc, 1sc) x 6
- (2sc, 1sc, 1sc, 1sc, 1sc, 1sc) x 6
- Next 2 rows: 1sc x 36
- Affix lightly to the head, slightly offset to the back.
I like to do some outlines using the black yarn so I can get the hair just right. These strands of yarn will be taken out so they are not fixed.

Next we cut about 10-15cm strips of yarn, we need enough to cover the head so i just cut a few strands at a time and attach as I go along. (If you need help with this, do a search on how to attach Amigurumi hair or visit this page.) See below for a rough diagram, the “X”s represents a loop of hair.


Now it is time to cut the hair. Be very careful though, unlike real hair, it does not grow back! I also added a little craft glue to hold the hair down but not too much until it hardens the whole head.
Groom Belt and Collar
Belt: Super easy, do a chain of 24 sc, turn and do 22 sc from the 3rd stitch. Leave a long tail and use that to stitch to the body. Embroider a little square for the buckle and it is done!

Collar: Chain 18sc, turn, 16sc in third stitch. Leave a long tail and attach just the top to the neck area, with the opening in front.

For the tie, I decided I’m going to just cut out using a piece of cloth as it was silver and I do not have silver yarn.
Suit Amigurumi
This suit has many parts. Each piece is detailed below.
Back
- Chain 17 stitches in the color of the suit, in this case, it is usually the same color as the pants.
- Turn and do 1sc from the third stitch, x13
- Chain 1, turn and 1sc x 10 from 2nd stitch
- Turn and 1sc x 10 from 2nd stitch, 1dec
- Chain 1, turn and 1sc x 10 from 2nd stitch
- Chain 1, turn and 2sc in 2nd stitch, 1sc x 8, 2sc
- Rows 7-17: Chain 1, turn and 1sc x 12 from 2nd stitch.

Front
From the back piece, start from the top edge (any side) and work inwards.
- 1 sc x 5, turn, 1sc from 2nd stitch x 4
- Chain 1, 1sc x 4 from 2nd stitch
- Turn 1sc x 3 from second stitch
- Chain 1, 1sc x 2 from 2nd stitch, 2sc
- Chain 1, 1sc x 3 from 2nd stitch
- Chain 1, 1sc x 3 from 2nd stitch, 2sc
- Chain 1, 1sc x 5 from 2nd stitch
- Chain 1, 1sc x 4 from 2nd stitch, 2sc
- Chain 1, 1sc x 6 from 2nd stitch
- Chain 1, 1sc x 5 from 2nd stitch, 2sc
- Next 10 Rows: Chain 1, 1sc x 7 from 2nd stitch
- Leave a long tail for stitching, instructions below.
Now do the same for the other edge. When it is done, it will look like this:

Next we are doing the collars on the suit before anything else.
In the outer loop, do a single sc in each stitch following this outline.

- 1sc x 23
- Turn, 1sc x 22 in outer loop
- Turn, 1sc x 21
- Turn, 1sc x 19
Now we do the bottom flaps, on both sides start from right below the collar. See below.

- 1sc x 8
- Turn, 1sc x 7
- Turn, 1sc x 4, 1 dec
Do the next side as well. When it is all done, stitch up the sides but leave a gap for the arms.
- Chain 12, join the end so it forms a loop.
- For the next 10 rows: 1sc x 12
- 1sc x 4
- Turn, Chain 1, 1 sc x 3 from second stitch, 2sc
- Turn, Chain 1, 1sc x 4 from second stitch, 2sc
- Turn, Chain 1, 1sc x5 from second stitch, 2sc
- Make two and join these to the arm holes.
-
Shoes
- Yay! We are almost done with the groom. That was really tough. Make two of these using black yarn.
- Chain of 7.
- Turn, 1 sc x 5 from 2nd stitch, 2sc, continue to the other side down the foundation chain, 2sc, 1sc x 3, 2sc (8)
- 2sc, (1sc, 2sc) x 7
- 1sc x 23 in top loops
- 1sc x 23
- Inside loops: 1dec, (1sc, 1dec) x 7
- 1dec, 1sc x 3, 1dec, 1dec
Leave a tail and stitch to the bottom of each leg. And it is done!

Ta-da! He is all ready for his big day!
Bride’s pattern is coming soon. Trust me, I’m working as fast as I can!
The bride amigurumi pattern is here.


[…] If you are looking for the groom, he is here. […]